HTML制作物一式を納品する場合、サーバーにアップする場合と、ファイルを納める場合といろいろケースがあると思いますが、ファイルを納める時にファイル構造のリスト化が必要な時があります。
そんな時、知ってると便利なwindowsコマンド、コマンドプロンプトから操作を行うのですが、
黒い画面に抵抗感が高い人も多いと思います。
今回の操作は、覚えてしまえば簡単なのでチャレンジしてみてください。
やり方
コマンドプロンプトの起動は
スタートメニュー → アクセサリ → コマンドプロンプト
です。

起動すると、きっとC:¥Users¥名前>_のようになっていると思います。
対象となるフォルダを指定する方法と
移動してから実行する方法の2つパターンがありますが、
まず移動してからの説明をします。
C:¥Users¥名前>_
の状態から
cd ¥フォルダのパス
を打ち込みEnterキー
cd は移動命令です。
ちなみにドライブの移動は cd を使う場合は cd /d D:。
簡単なのはD:だけで移動できます。
成功すると閲覧フォルダが移動され
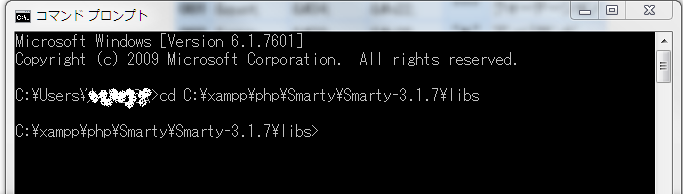
こんな感じになります。
表示させたいパスを打ち込むのが面倒なときはwindows7の場合、ファイルエクスプローラーで
対象のフォルダを開いてから、アドレスバー(?)をマウスでクリックするとパスが取れます。
![]()
エリアをクリックしてアクティブにする。
この状態でパスをコピー。
![]()
コマンドプロンプトの場合、「貼り付け」のショートカット(ctrl+v)は使えませんので
右クリックから「貼り付け」を選択して下さい。
そこでtreeと入力して「enter」してみて下さい。
フォルダー パスの一覧:  ボリューム OS
ボリューム シリアル番号は 00000200 CCA8:59AF です
C:.
├─plugins
└─sysplugins
現在の場所からみた下層のフォルダがツリー表示されたと思います。
ファイルも含めてツリー表示したい場合は/fオプションをつけます。
tree /fと入力して「enter」
フォルダー パスの一覧:  ボリューム OS
ボリューム シリアル番号は 00000200 CCA8:59AF です
C:.
│  debug.tpl
│  Smarty.class.php
│  SmartyBC.class.php
│  tree.txt
│
├─plugins
│      block.textformat.php
│      function.counter.php
│      function.cycle.php
│      function.fetch.php
│      function.html_checkboxes.php
│      function.html_image.php
│      function.html_options.php
│      function.html_radios.php
│      function.html_select_date.php
│      function.html_select_time.php
│      function.html_table.php
│      function.mailto.php
│      function.math.php
│      modifier.capitalize.php
│      modifier.date_format.php
│      modifier.debug_print_var.php
│      modifier.escape.php
│      modifier.regex_replace.php
│      modifier.replace.php
│      modifier.spacify.php
│      modifier.truncate.php
│      modifiercompiler.cat.php
│      modifiercompiler.count_characters.php
│      modifiercompiler.count_paragraphs.php
│      modifiercompiler.count_sentences.php
│      modifiercompiler.count_words.php
│      modifiercompiler.default.php
│      modifiercompiler.escape.php
│      modifiercompiler.from_charset.php
│      modifiercompiler.indent.php
│      modifiercompiler.lower.php
│      modifiercompiler.noprint.php
│      modifiercompiler.string_format.php
│      modifiercompiler.strip.php
│      modifiercompiler.strip_tags.php
│      modifiercompiler.to_charset.php
│      modifiercompiler.unescape.php
│      modifiercompiler.upper.php
│      modifiercompiler.wordwrap.php
│      outputfilter.trimwhitespace.php
│      shared.escape_special_chars.php
│      shared.literal_compiler_param.php
│      shared.make_timestamp.php
│      shared.mb_str_replace.php
│      shared.mb_unicode.php
│      shared.mb_wordwrap.php
│      variablefilter.htmlspecialchars.php
│
└─sysplugins
        smarty_cacheresource.php
        smarty_cacheresource_custom.php
        smarty_cacheresource_keyvaluestore.php
        smarty_config_source.php
        smarty_internal_cacheresource_file.php
        smarty_internal_compilebase.php
        smarty_internal_compile_append.php
        smarty_internal_compile_assign.php
        smarty_internal_compile_block.php
        smarty_internal_compile_break.php
        smarty_internal_compile_call.php
        smarty_internal_compile_capture.php
        smarty_internal_compile_config_load.php
        smarty_internal_compile_continue.php
        smarty_internal_compile_debug.php
        smarty_internal_compile_eval.php
        smarty_internal_compile_extends.php
        smarty_internal_compile_for.php
        smarty_internal_compile_foreach.php
        smarty_internal_compile_function.php
        smarty_internal_compile_if.php
        smarty_internal_compile_include.php
        smarty_internal_compile_include_php.php
        smarty_internal_compile_insert.php
        smarty_internal_compile_ldelim.php
        smarty_internal_compile_nocache.php
        smarty_internal_compile_private_block_plugin.php
        smarty_internal_compile_private_function_plugin.php
        smarty_internal_compile_private_modifier.php
        smarty_internal_compile_private_object_block_function.php
        smarty_internal_compile_private_object_function.php
        smarty_internal_compile_private_print_expression.php
        smarty_internal_compile_private_registered_block.php
        smarty_internal_compile_private_registered_function.php
        smarty_internal_compile_private_special_variable.php
        smarty_internal_compile_rdelim.php
        smarty_internal_compile_section.php
        smarty_internal_compile_setfilter.php
        smarty_internal_compile_while.php
        smarty_internal_config.php
        smarty_internal_configfilelexer.php
        smarty_internal_configfileparser.php
        smarty_internal_config_file_compiler.php
        smarty_internal_data.php
        smarty_internal_debug.php
        smarty_internal_filter_handler.php
        smarty_internal_function_call_handler.php
        smarty_internal_get_include_path.php
        smarty_internal_nocache_insert.php
        smarty_internal_parsetree.php
        smarty_internal_resource_eval.php
        smarty_internal_resource_extends.php
        smarty_internal_resource_file.php
        smarty_internal_resource_php.php
        smarty_internal_resource_registered.php
        smarty_internal_resource_stream.php
        smarty_internal_resource_string.php
        smarty_internal_smartytemplatecompiler.php
        smarty_internal_template.php
        smarty_internal_templatebase.php
        smarty_internal_templatecompilerbase.php
        smarty_internal_templatelexer.php
        smarty_internal_templateparser.php
        smarty_internal_utility.php
        smarty_internal_write_file.php
        smarty_resource.php
        smarty_resource_custom.php
        smarty_resource_recompiled.php
        smarty_resource_uncompiled.php
        smarty_security.php
出力だけでは使えないのでこの内容をファイル保存するオプションも更に追加
tree /f >tree.txtと入力して「enter」
現在の場所にファイル名「tree.txt」ができあがって、そこに先ほどの内容が保存されます。
ちょっとした仕様書になどにも
テキストでフォルダやファイルの階層表示を保存してくれるので、ちょっとした仕様書などにも
そのファイルの内容やコメントなど手っ取り早く追記できたりと便利です。
追記
2016-01-27 ドライブの移動方法など追記
コメント
[…] ○知ってると便利なフォルダ・ファイル構造をツリー形式にテキスト化してくれるコマンド「tree」 >tree c:\ /F c:\tree.txt […]
[…] 参考にさせていただいたURL http://heppoko-room.net/archives/464 […]